(SPEECH)
[00:00:00.00] [MUSIC PLAYING]
(DESCRIPTION)
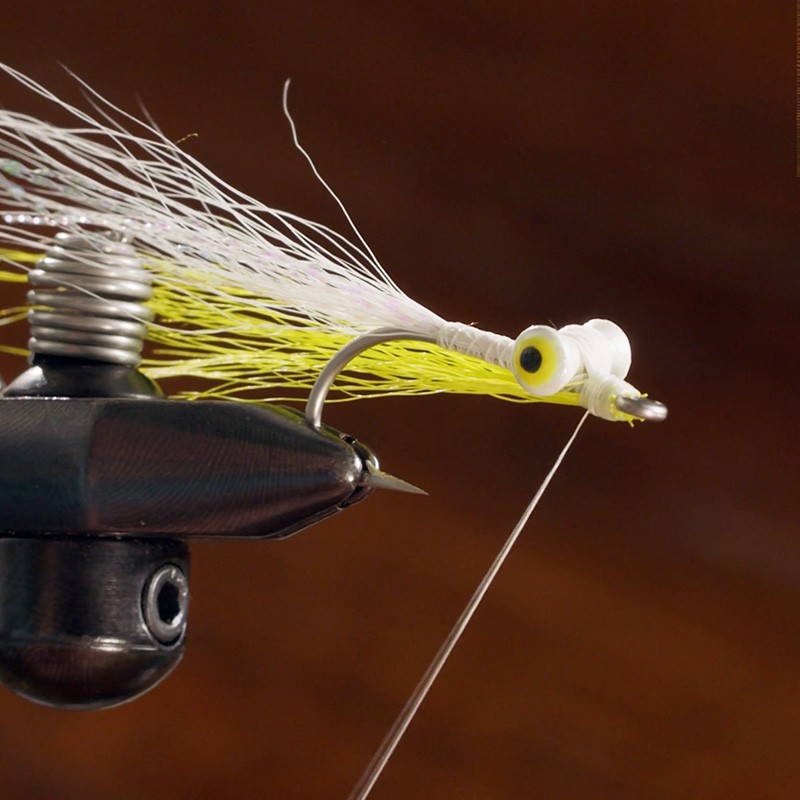
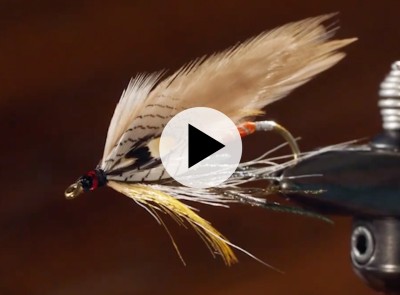
[00:00:00.00] Text: Fly Tying with L.L. Bean. The Clouser Minnow. A yellow-and-white Clouser Minnow pattern appears on a hook.
(SPEECH)
[00:00:06.95] Hi, everybody. I'm Emily Bastian. I'm the Assistant Manager and Fly Tying Instructor at L.L.Bean's Hunting and Fishing Store in Freeport, Maine. And today, we're going to tie one of the most versatile fly patterns ever developed for both fresh and salt water, the Clouser Minnow.
[00:00:25.85] The Clouser Minnow was invented in 1987 by Pennsylvania fly tyer Bob Clouser. It can be tied to imitate a number of different species of bait fish for both fresh and saltwater game fish species. All told, it's probably caught more species of fish around the world than a lot of other patterns put together.
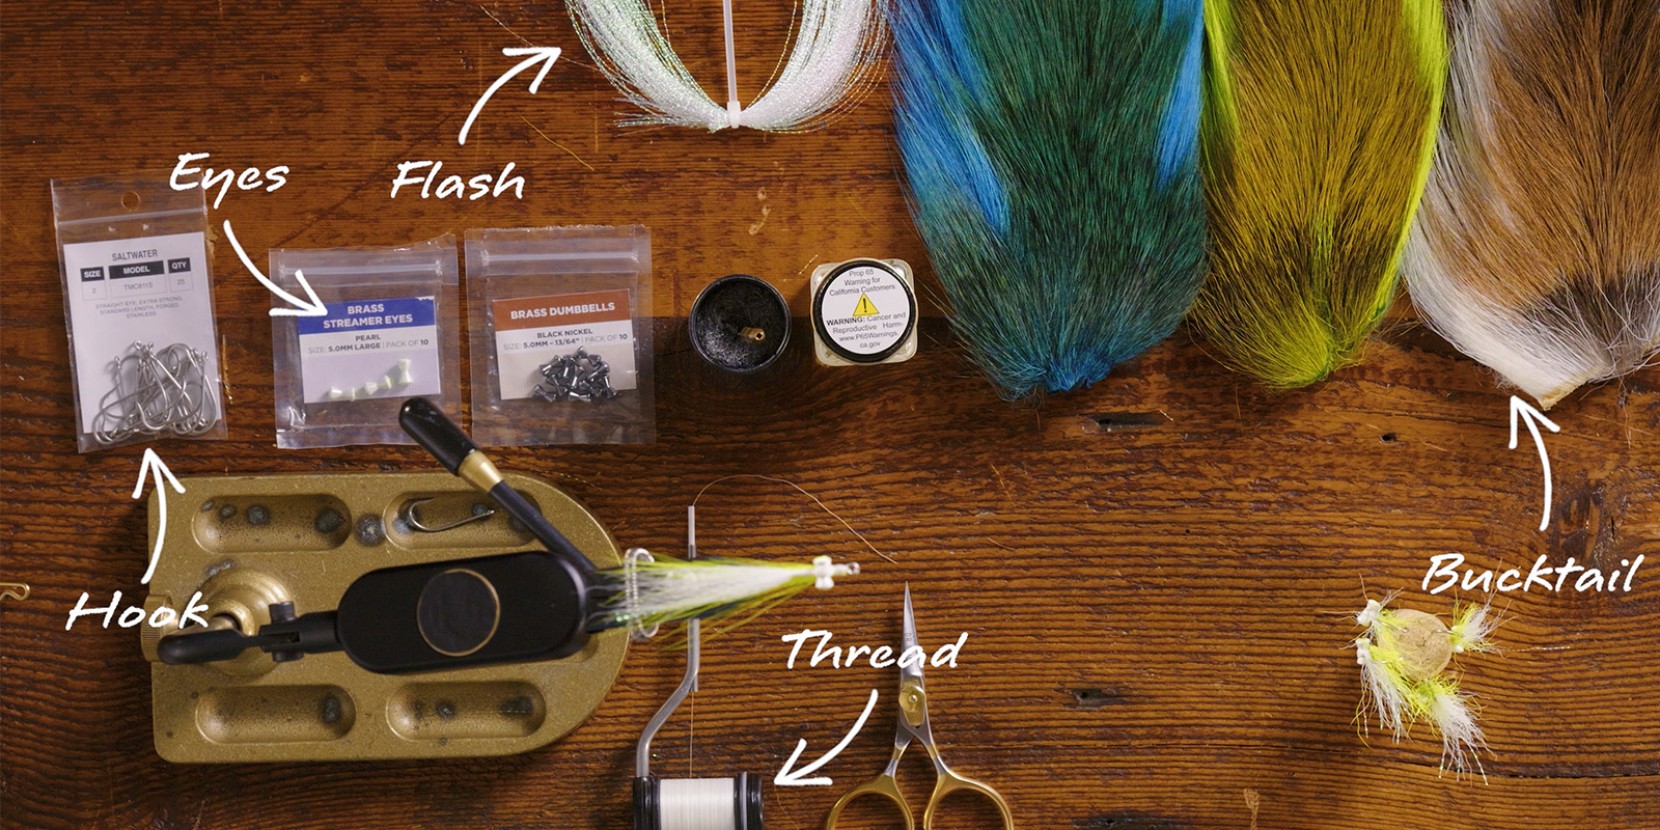
[00:00:46.59] Here are the materials you'll need to tie the Clouser Minnow. The hook we're using is a Mustad 34007 in size 2 aught. But we can tie this fly in a range of different sizes. Thread is white in 210 or 140 denier, nontoxic dumbbell eyes size large.
[00:01:05.87] The belly of the fly is natural white bucktail. And you want to use those nice long fibers from the center of the tail. Flash is 3 to 4 strands of crystal flash, color of your choice. And the back of the fly in this version is chartreuse bucktail. But there are a range of colors that you can use to imitate different baitfish patterns. I like olive, blue, brown, tan, and black. There's a link to a PDF of the full list of materials in the description below.
[00:01:35.39] We're going to tie this on a saltwater hook. And you can use sizes up to 1 or 2 aught, down to a size 4 or 6. This is a size 2 saltwater hook that we're going to use today. Short shank. It's a Tiemco 811S.
(DESCRIPTION)
[00:01:51.24] Clamps hook.
(SPEECH)
[00:01:52.27] Make sure that's securely in the jaws of the vise. I'll be using a white thread. It's a 210 denier, so it's a pretty heavy thread. You can also use 3 aught. Gel spun works quite well also. But we ultimately just want a thread with a nice high tensile strength, strong thread that will allow us to put some good pressure on the materials as we tie them in here. You need a good strong thread for bucktail.
(DESCRIPTION)
[00:02:20.92] Spins thread around.
(SPEECH)
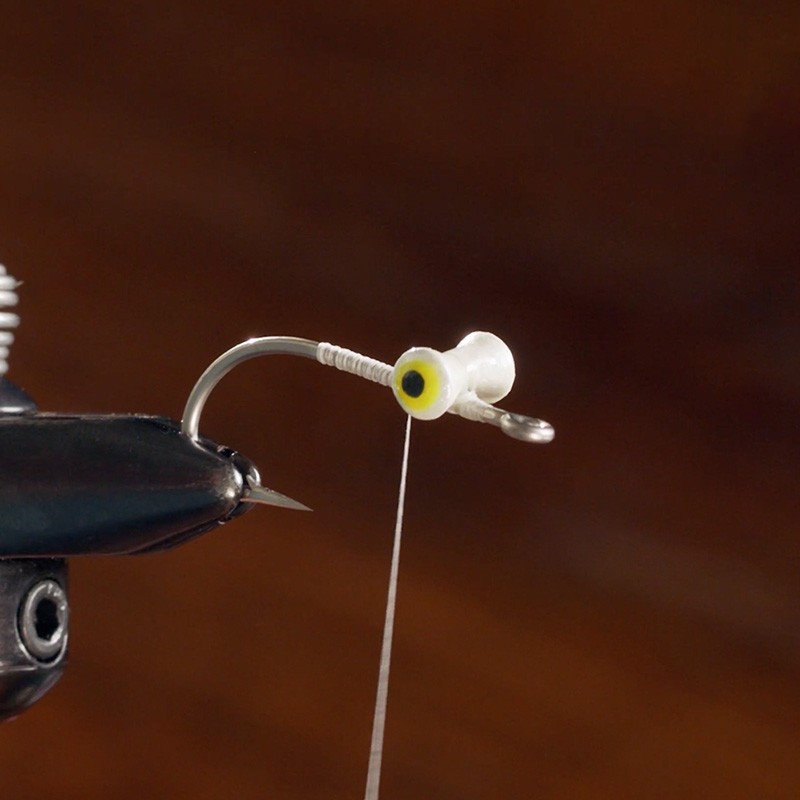
[00:02:22.14] What I'm doing right now is just laying down a thread base on the hook shank and go back to about 2/3 of the length. And now I'm advancing my thread up to the point where we'll be tying on the dumbbell eyes, which is going to be about 2 eye lengths back on the shank of the hook, so I can use my scissors to gauge that length.
[00:02:43.80] Or I can take the eyes themselves and use those to measure the distance for where I want to tie those in. This allows for enough space at the head of the fly to tie in all the materials, as well as consistency, now with a thread bump, just to put a little bit of mass on the shank of the hook, where we'll tie in those eyes.
[00:03:06.60] You can also achieve this by using a little pinch of dubbing as well. So play around with it, see what works for you. And we'll pick up those eyes and use just a couple figure 8 wraps to attach them lightly to the top of the hook, just so I can check the placement. Yep, looks good. Make sure it's where I like it.
[00:03:29.64] And now I'm using good solid tension with my thread as I put a number figure 8 wraps over the top of the eyes and the hook shank to secure those to the shaft of the hook. Then I'm going to come behind and in front, just so that I prevent those eyes from slipping or sliding around the shank of the hook.
[00:03:57.70] Then I'm going to even take my thread around the base of the eyes like this. This is what we call helicopter wraps, provides a base for the eyes so that they don't want to slip around the shank of the hook. That feels pretty secure to me.
[00:04:16.43] At this point, I like to put a little bit of head cement in just to secure those thread wraps and lock everything in place. You can use super glue for this, too, just trying to penetrate those thread wraps.
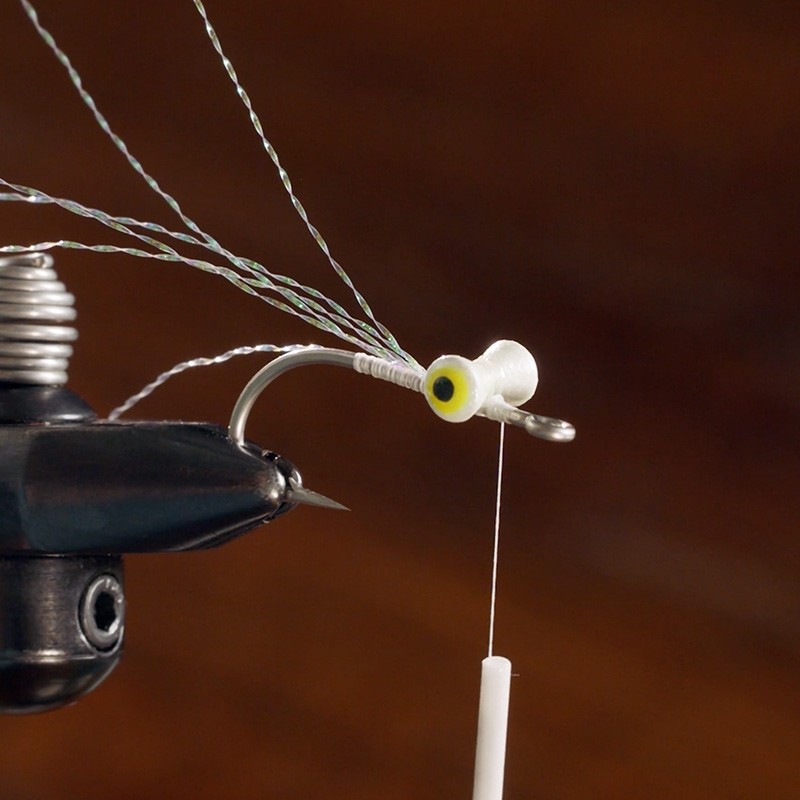
[00:04:32.93] Next, I'm going to tie in some crystal flash. And this is going to essentially imitate the lateral line of this fish. I like crystal flash because of its scale-like appearance. It gives the-- makes this fly look very lifelike. It's optional though. You don't have to use flash. You can tie this fly without it.
(DESCRIPTION)
[00:04:54.89] Snips off thread.
(SPEECH)
[00:04:55.94] I'm just going to pull out a few strands, trim up those ends.
(DESCRIPTION)
[00:04:59.28] Ties it around.
(SPEECH)
[00:05:00.37] We're going to tie it in the center. Lock it down with just a couple wraps. And then I can fold that over so I have my full clump. Again, don't make it overly flashy. Just a few strands is fine.
[00:05:15.49] I'm going to trim that so that it's the overall length of the fly, which is going to be 2 full hook lengths, right about there.
(DESCRIPTION)
[00:05:23.33] She cuts off lines.
(SPEECH)
[00:05:25.03] Don't worry about cutting it perfectly evenly. In fact, I think it looks better if it's a little uneven, a little more natural.
(DESCRIPTION)
[00:05:31.82] Cuts off extra piece of line.
(SPEECH)
[00:05:33.40] Look at that flyaway guy there. Good. Then advance your thread to a position in front of the eyes.
[00:05:43.30] Next, we'll be tying in the belly of the fly. This fly, you'll notice, is weighted on top. So that means when it's swimming, it will swim hook point up. It will be inverted. So the white that we're tying in right now will serve as the belly of the fly.
(DESCRIPTION)
[00:05:58.16] Holds bucktail.
(SPEECH)
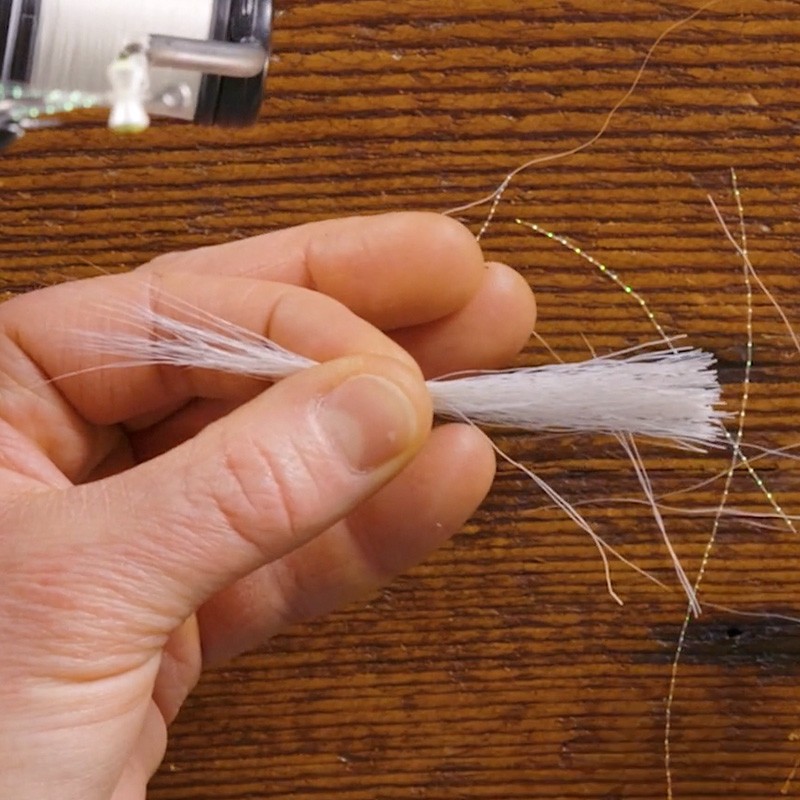
[00:05:58.99] This is northeast bucktail from a whitetail deer. It's the natural color white, so it hasn't been dyed. This is a great color for the belly of your fly, provides nice contrast with whatever other color you choose to use. We're going to select a clump of bucktail from the top half of the tail.
[00:06:16.93] You want to avoid these fibers down at the very bottom because they're much-- they're hollow. And they tend to really flare when you tie them in on the hook. So the ones up a little further, they're straighter. They behave a little better. Give the profile that we're looking for on this baitfish.
(DESCRIPTION)
[00:06:32.80] Grabs tuft.
(SPEECH)
[00:06:33.89] Now, I like my Clousers pretty sparse. And I think that's the general consensus among most certainly northeast striper fishermen. However, you can tie them-- you can dress them more heavily to imitate different types of bait, say a deeper-bodied bait like peanut bunker or something.
[00:06:53.67] So you see, I just cut a clump from the base right near the hide to prepare the bucktail. I'm just going to hold, grasp firmly about halfway down from the tips. And then I'm going to pull out to cull all those really short fibers that would not run the length of the fly and wouldn't add to the profile that we're looking for. So cull out all those short fibers.
(DESCRIPTION)
[00:07:21.72] She straightens the fibers.
(SPEECH)
[00:07:24.41] Even them up a little bit. We're not going to use a hair stacker because I like the more natural uneven look for this fly. But you can stack them by hand a little bit to clean that up.
(DESCRIPTION)
[00:07:38.25] Straightens the fibers.
(SPEECH)
[00:07:39.56] Holding in my right hand, since I'm a right-handed tire, I'm just going to measure my length, two times the length of the hook. Transfer it to my left hand and trim those at the base, nice and flush so we have a good point to tie in on top of the hook.
[00:08:00.03] I'm going to hold those fibers at about a 45-degree angle. And I'm going to come-- and they're going to be ending just behind the eye so that I can cover those butt ends with my thread. I'm going to come up with my thread and bring up two nice loose collecting wraps.
[00:08:16.59] And then my tension will come in as I lift up after those two wraps. And that's going to bring all those fibers straight down on top of the hook shank without causing them to turn around or slide.
(DESCRIPTION)
[00:08:29.02] Wraps around hook shank.
(SPEECH)
[00:08:30.11] And then I can really put some nice even tension on that thread, cover up all those little butt ends and really lock it in.
(DESCRIPTION)
[00:08:41.35] Continues to wrap around hook shank.
(SPEECH)
[00:08:44.45] While I'm holding the bucktail over top of the eyes, I'm going to come under with my thread, and then over behind the eyes to lash it down in behind with a few wraps.
(DESCRIPTION)
[00:08:57.83] Straightens the bucktail.
(SPEECH)
[00:08:59.50] Check the placement.
(DESCRIPTION)
[00:09:00.95] Bucktail stays elevated.
(SPEECH)
[00:09:02.47] You can tweak it a little bit with your fingers if you need to, to make sure it's staying on top.
[00:09:06.79] Now I'm going to wrap back along the shank of the hook just to capture that all and tighten it into the body. You'll see I'm twisting the thread a little bit just to create a thinner diameter, a rope-like appearance, so that as I wrap back with these open wraps, you can see that little bit of segmentation.
[00:09:30.58] All right. And I'm going to stop right about halfway between the barb and the point, and then create the back of the body there with the thread anyway. And then wrap forward, open wraps again.
(DESCRIPTION)
[00:09:43.82] Wraps the thread around the shank to the front of the eye.
(SPEECH)
[00:09:47.59] I'm going to bring my thread in front of the eye and move on to the back of the fly. We're preparing to tie in the second color. I'm going to invert my vice so that I have a little better angle to tie the back of the fly or the wing of the fly in.
[00:10:06.46] The back of the fly, the color is really up to you. I've seen this fly tied in all white. You can use blue. You can use olive, purple, black. All black is a good color as well. Today, we're going to use chartreuse, probably the most popular color combo for striped bass, anyway, up here in the northeast. If you fished up here at all, you've probably heard somebody say, if it ain't chartreuse, it ain't no use. And that's how we're going to tie this one today.
[00:10:33.96] So, again, selecting our bucktail. This is northeast bucktail. It's dyed, obviously, chartreuse from the top half of that tail.
(DESCRIPTION)
[00:10:47.58] Grabs tuft.
(SPEECH)
[00:10:48.24] Just get a nice sized clump. Try to match the size of the clump that you cut the white from before. We'll cull out a lot of that when we prepare it for tying in.
(DESCRIPTION)
[00:10:59.41] Smooths out.
(SPEECH)
[00:11:00.23] Grip up near the top. Pull out all those short fibers that we don't need.
(DESCRIPTION)
[00:11:08.85] Pulls short fibers off of the ends then compares with white bucktail.
(SPEECH)
[00:11:12.71] And then measure for length to match your white.
(DESCRIPTION)
[00:11:15.98] She trims off the yellow butt ends.
(SPEECH)
[00:11:18.83] And trim your buttons.
(DESCRIPTION)
[00:11:20.84] Text: 3. Tie in the back. She holds the yellow clump between the eyes and eye of the hook.
(SPEECH)
[00:11:26.93] I'm going to hold that clump right between the eyes and the eye of the hook. And again, use my two nice loose collecting wraps just to bring everything in place. And then tension as I come up will pull those fibers down to the shank of the hook.
(DESCRIPTION)
[00:11:44.16] Wraps thread around the clump.
(SPEECH)
[00:11:45.70] Now I'm keeping nice, tight, even tension as I come around and really lash those down. Try to cover up all those little butt ends of material. If there's a few that you miss that are a little too long, you can trim them up now, too.
(DESCRIPTION)
[00:12:02.87] With the scissors, she trims off small butt ends of the yellow clump. She then rotates the hook around, then winds more thread around the yellow clumpb between the eyes and the eye of the hook.
(SPEECH)
[00:12:15.53] All right, now I'm just simply creating a nice, uniformly shaped head. I'm trying to go for a little bit of a cone shape. So thicker at the eyes, tapering down to the hook eye.
(DESCRIPTION)
[00:12:29.89] She continues to wind the thread around, then grabs a whip finish tool and wraps with it.
(SPEECH)
[00:12:34.51] And then a whip finish will complete the fly or the tying part of the fly. You can use your fingers or your hands to do a whip finish. I like a rotating whip finish tool. I use it to help make the final shape of the head.
(DESCRIPTION)
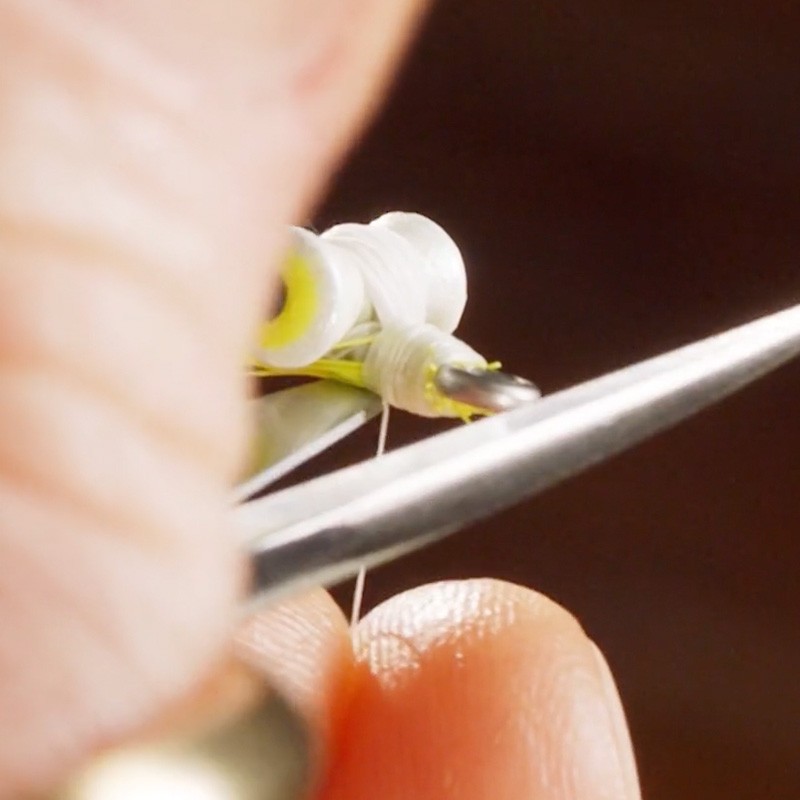
[00:12:52.58] She pulls the thread taught and then snips off the loose thread.
(SPEECH)
[00:12:57.11] And snip.
[00:12:59.08] Last step, apply your head cement.
(DESCRIPTION)
[00:13:02.98] She dabs tip of tool in head cement.
(SPEECH)
[00:13:05.14] We're going to coat the bucktail on top of the eyes. Put a little bit over the body here, too, where we wrapped our thread over the white.
(DESCRIPTION)
[00:13:13.92] She applies head cement.
(SPEECH)
[00:13:15.43] It just helps make a nice durable fly that will hold up to a bunch of fish.
[00:13:19.77] [MUSIC PLAYING]
(DESCRIPTION)
[00:13:20.25] Pierces through eye.
(SPEECH)
[00:13:22.12] Clear your eye. Separate the bucktail so it's evenly distributed on both sides of the hook.
(DESCRIPTION)
[00:13:29.38] Finished Clouser Minnow.
(SPEECH)
[00:13:30.82] All right, and that's your Clouser Minnow.
(DESCRIPTION)
[00:13:33.20] Text: For more fishing tips, visit LLBean.com/explore.
(SPEECH)
[00:13:37.48] All right, thanks for joining us today with the Clouser Minnow, everybody. Tell us where you'd like to fly fish in the comments below. Also, let us know what kind of videos you'd like to see more of. And don't forget to and subscribe so you don't miss our next video. For more fishing tips and inspiration, visit Explore L.L.Bean at llbean.com/explore. See you next time.


