(SPEECH)
[00:00:00.00] [MUSIC PLAYING]
(DESCRIPTION)
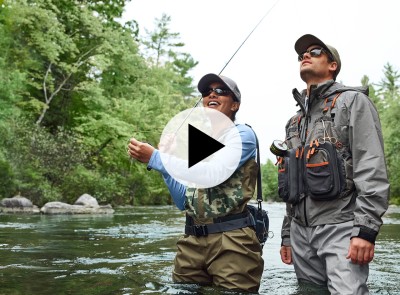
[00:00:00.00] Text: Fly Tying with L.L. Bean. The Elk Hair Caddis. A woman fly fishes in a river.
(SPEECH)
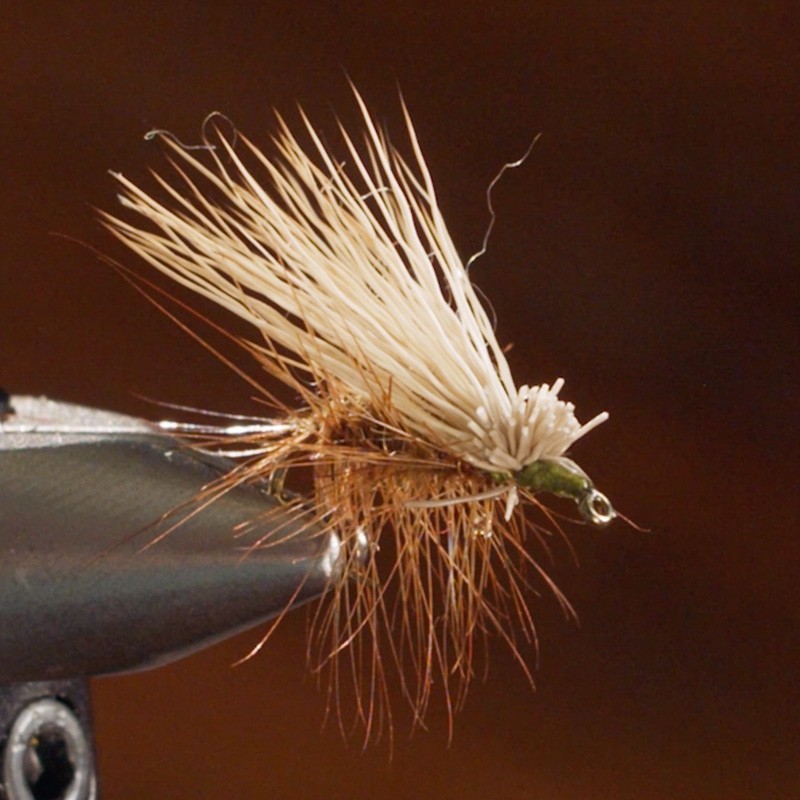
[00:00:06.80] Hi, everybody. I'm Emily Bastian here from the L.L.Bean Hunting and Fishing Store in Freeport, Maine, where I teach a lot of our fly tying classes. And today, I'm excited to be with you to show you how to tie the elk hair caddis, an extremely popular and versatile dry fly pattern that should be in every trout fisherman's fly box.
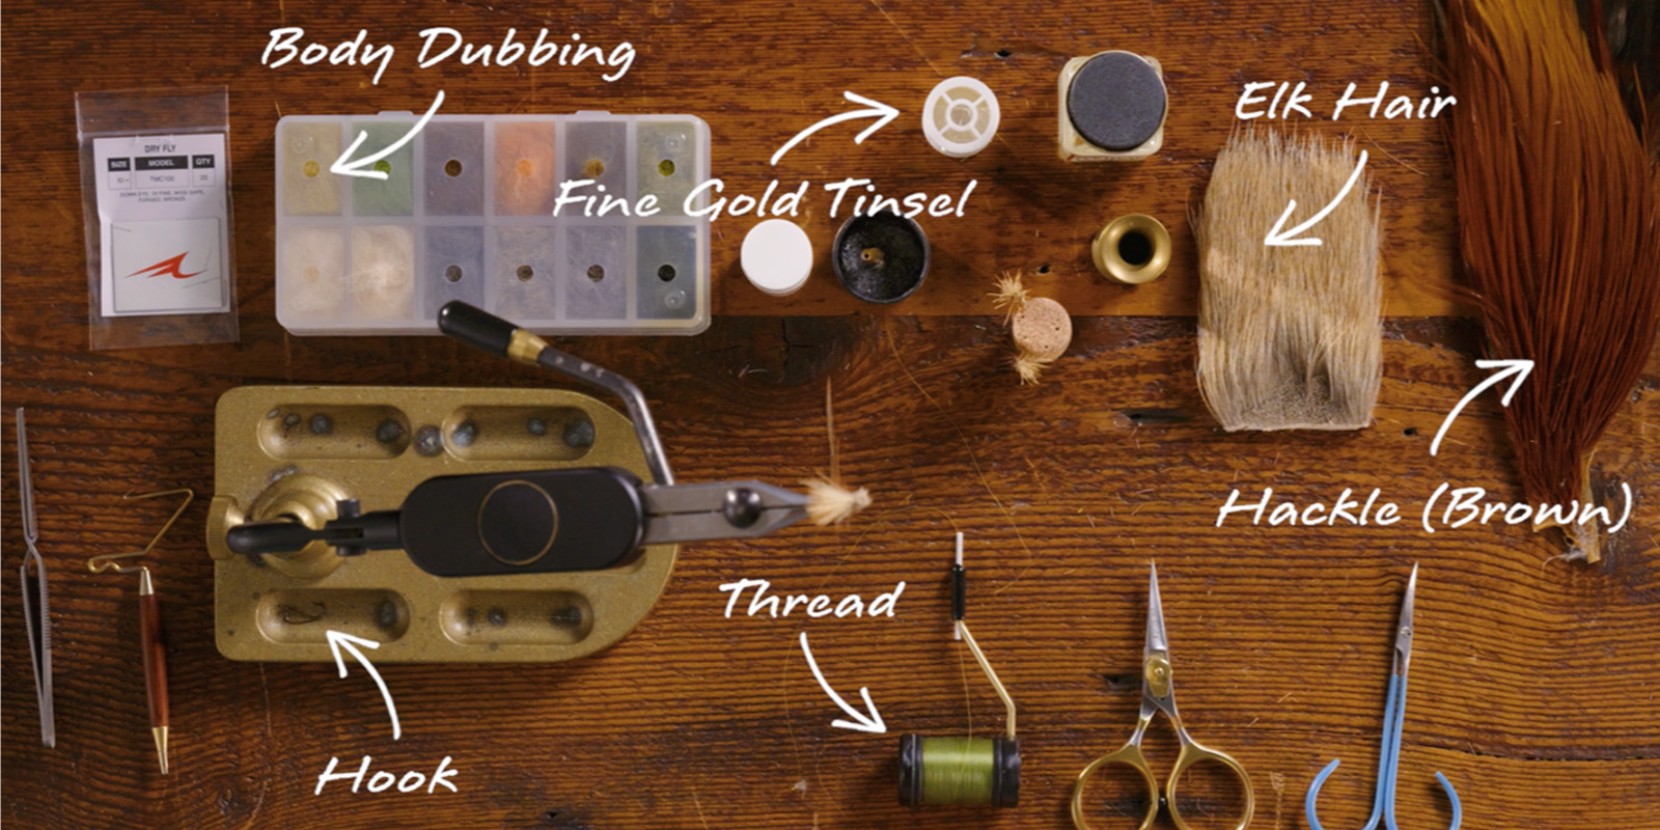
[00:00:27.41] The elk hair caddis was developed by Pennsylvania fly tier, Al Troth, in 1957, and it remains one of the most popular dry fly patterns of all time. It's a great way to imitate adult caddis flies of various species. Here are the materials you'll need to tie the elk hair caddis, a wide-gap dry fly hook in size 10 to 18-- a pretty big range for caddis fly imitations. The thread will be 8 or 6 aught in color to match the body.
[00:00:59.85] Today, we'll use olive thread. The ribbing is fine gold tinsel, brown hackle. A good stiff dry fly hackle is best. Body dubbing material will be olive, but again, you can choose different colors to imitate different species of caddis flies. The wing is elk hair, cleaned and stacked, and you can also use deer hair for this. I like the Coastal deer hair for very small caddis patterns. There's a link to a PDF of the full list of materials in the description below.
[00:01:31.03] So today, I will use a larger hook, size 10, and that can be a great size for just an attractor dry fly as well as a good one to show the techniques of this particular pattern. You want a wide-gap dry fly hook, and I like to start by pinching the barbs on my trout hooks. You can use the jaws of your vise or a pair of forceps. You can also do that streamside or just by barbless hooks right from the beginning.
[00:02:02.78] I'm using a thread color that will match the body of the fly. So we're going to use olive today, and the size is 6 aught. A little larger than some will use for dry flies but I like this for elk hair caddis because it allows me to put a little extra pressure on the elk hair as I'm tying it in.
(DESCRIPTION)
[00:02:23.40] Cuts thread.
(SPEECH)
[00:02:24.65] But if I was tying a, say a size 18 black caddis, I'd definitely use an 8-aught thread, something a little smaller.
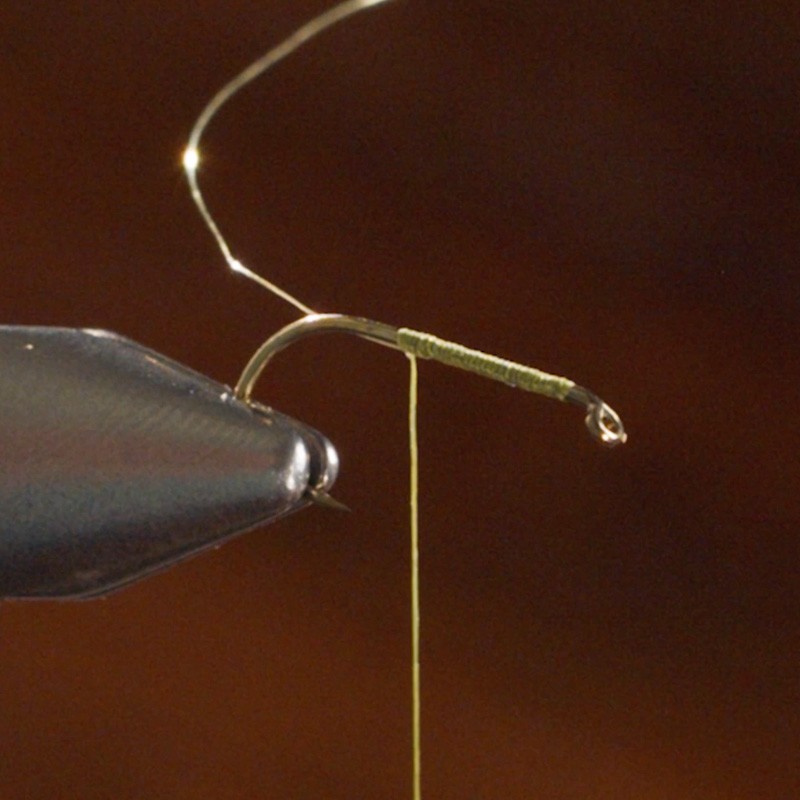
[00:02:32.15] I'm just laying down a thread body on the shank of the hook in preparation to tie in my first material, which is gold or copper wire. This will serve as the ribbing for the fly. It's a very small diameter wire. I'm going to trim this with a different pair of scissors. Any hard or very dense material wire you want to trim with a pair of scissors other than your fly, your primary thread scissors--
(DESCRIPTION)
[00:03:05.90] Places wire on hook.
(SPEECH)
[00:03:07.89] I'll bring that up against the shank of the hook there to hold it in place and draw it back.
(DESCRIPTION)
[00:03:13.14] She wraps the wire around the hook.
(SPEECH)
[00:03:15.72] And wrap back to lock it in. I can leave some length of wire to incorporate into the body of the fly, to help actually build up some of that bulk. That's fine. Next step is to select a hackle feather. And this is a dry fly hackle. It's a half neck. And I'm looking for dry fly hackle that has nice stiff barbs, densely packed, not too webby and has a good flexible stem.
[00:03:43.83] Measuring the size of the hackle is based on the gap of the hook, so we want one that has barbs that are about a hook and a half gap.
(DESCRIPTION)
[00:03:54.70] Pulls feather off hackle.
(SPEECH)
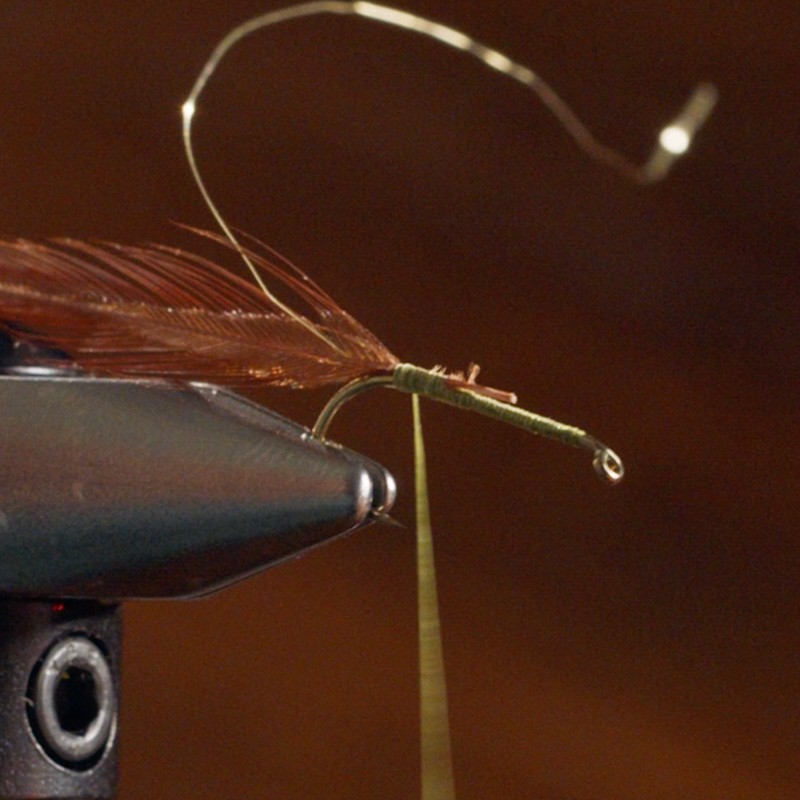
[00:03:56.94] So we can measure it here with the hook and the vise. That looks perfect. Preparing the feather-- I'll just strip off the fluffy, wispy feather barbs at the base of the feather and then trim the bottom few barbs like so. This creates a nice anchor point for my thread. When I'm tying this in, it'll really help lock it in to the hook.
(DESCRIPTION)
[00:04:26.94] Places feather on hook and wraps thread.
(SPEECH)
[00:04:29.27] So I'll lay that on top and wrap back. Notice how I'm covering up all those little cut barbs that I exposed there? Perfect. I'll trim some of this stem back, but again, I'm going to leave a length of it to incorporate into the body of the fly, use my thread to cover up those butt ends, wrapping forward and stopping in about the midpoint of the hook shank.
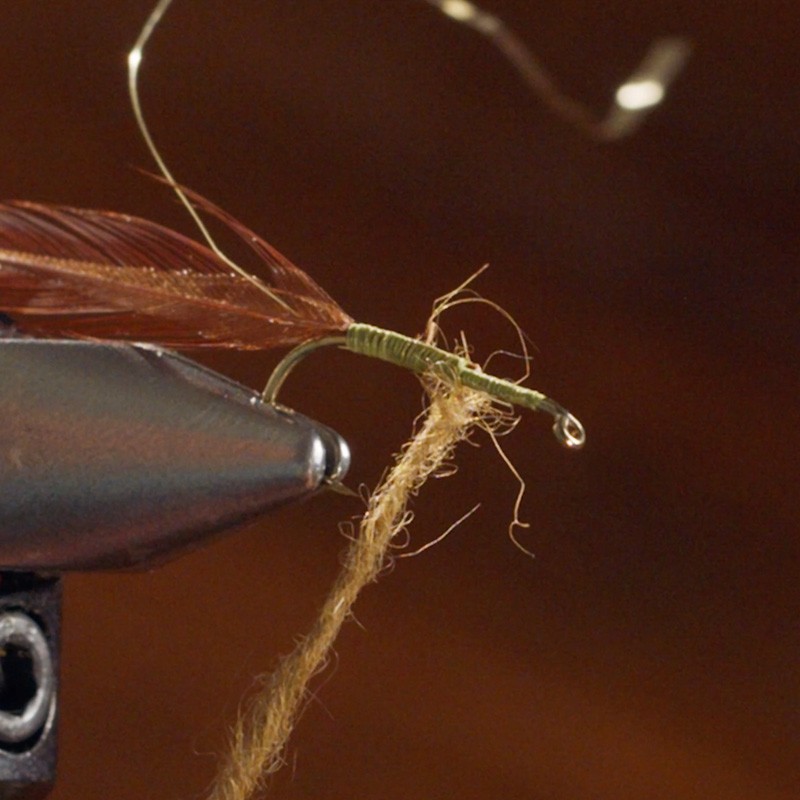
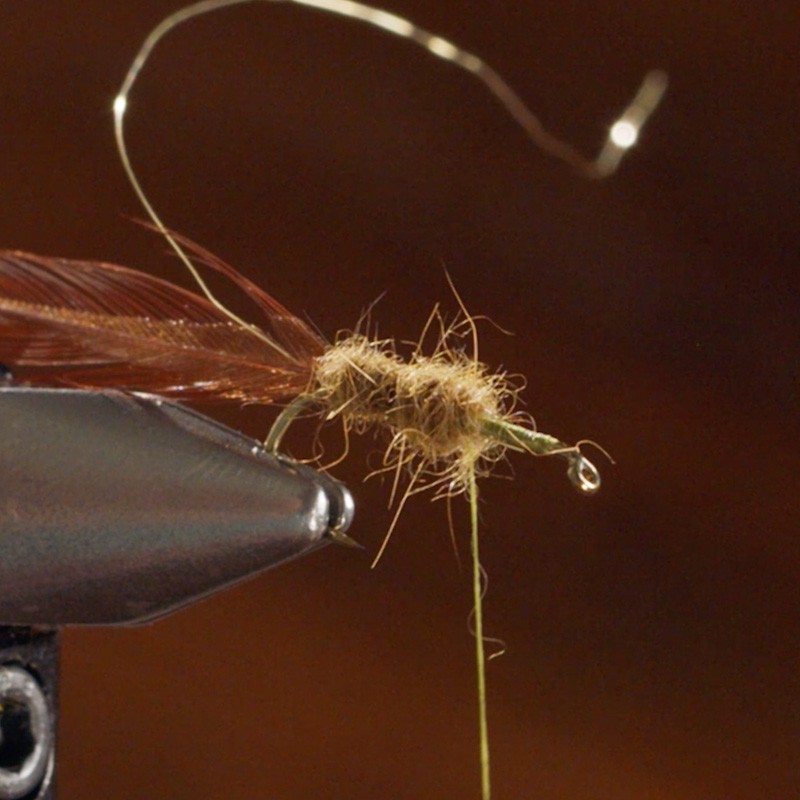
[00:05:02.51] Our next step is to apply the dubbing to the body of the fly. And there's lots of choices out there for dubbing, both natural and synthetic options, dyed in all colors of the rainbow. Today we're tying an olive caddis and I'm using a natural hairs ear dubbing.
[00:05:19.99] Different dubbing techniques-- Some people will use wax right on the thread. Some folks have success without wax at all. I like to use a little bit just on my fingertips just so that my fingertips are just tacky enough to help aid in the creation of that dubbing noodle but not so sticky that they're going to get in my way or over wax the thread.
[00:05:44.20] And you'll notice I'm taking just a tiny pinch at a time and twisting in one direction on the thread to create a nice tight uniform dubbing noodle.
(DESCRIPTION)
[00:06:02.86] Twists noodle onto thread.
(SPEECH)
[00:06:05.02] You can always add more but it's hard to take dubbing off if you overdub, so err on the side of caution there.
[00:06:13.33] And I'm rapping back over the body with my dubbing noodle. I am going to need a little bit more.
(DESCRIPTION)
[00:06:20.21] She adds more dubbing to the thread and twists it.
(SPEECH)
[00:06:27.49] And then I'll rap forward. This is helping bulk up this body a little bit more. If you've seen caddisflies there, they're shaggy. They don't have that long, slender uniform body like a mayfly does so it's OK to have a little bulk in your caddis bodies.
[00:06:49.24] Next step is to wrap our hackle. The hackle is to aid in the flotation of the fly. And I'm going to wrap it pretty densely, you're going to see. The reason being it helps the fly ride a little higher. It's going to perform better in riffles and broken water.
(DESCRIPTION)
[00:07:12.48] She wraps the hackle around the hook.
(SPEECH)
[00:07:16.56] You can use hackle pliers too, but this feather was long enough I was able to get a good grip on it with just my fingers.
(DESCRIPTION)
[00:07:23.66] She continues wrapping, creating spiky threads around the hook that resemble a fly.
(SPEECH)
[00:07:30.42] There we go. And then I can trim off the end of the feather.
[00:07:35.97] You'll notice I wrap my hackle first. There are tiers who will wrap the ribbing first but I like to use the wire as really a way to lock that hackle in and help the fly be more durable. I think it stands up to more fish, more toothy salmonids than a fly that doesn't have the rib wrapped over top. I'm also counter wrapping it, so I'm wrapping the rib in the opposite direction that I wrapped. So over the hook and towards me, the opposite direction that I wrapped the hackle.
(DESCRIPTION)
[00:08:05.80] She continues wrapping, this time in the other direction.
(SPEECH)
[00:08:11.87] Nice.
(DESCRIPTION)
[00:08:13.65] She wraps the wire around the hook.
(SPEECH)
[00:08:19.88] You can go in and trim that off.
(DESCRIPTION)
[00:08:21.99] She cuts the wire close to the hook.
(SPEECH)
[00:08:25.52] Now, just for good measure, I like to throw in a whip finish at this point in the fly. The last thing I want to have happen right now is to lose thread tension and have my hackle come unwound. It'll be very hard to rescue that if you experience unwinding of the hackle.
[00:08:44.66] All right. Next step is the wing. To prepare that for tying in, I'm just going to trim the very top of the fly of hackle. Not all the way to the fly, but I'm trying to create a little ramp-in effect that will help prop up that elk hair wing. We're using elk hair today. You can use deer hair, as well. A lot of the smaller caddis flies, I'll use a Coastal deer hair or something shorter and more fine but this is great for a larger size caddis.
[00:09:20.46] So I have a piece of elk hide here. I'm going to take a pinch of hair. Getting the width right, you just have to play with it a little bit. For this particular size fly, I'm going to say about half-a-pencil width. This is probably where we want to be.
(DESCRIPTION)
[00:09:37.15] Clips hair off of hide.
(SPEECH)
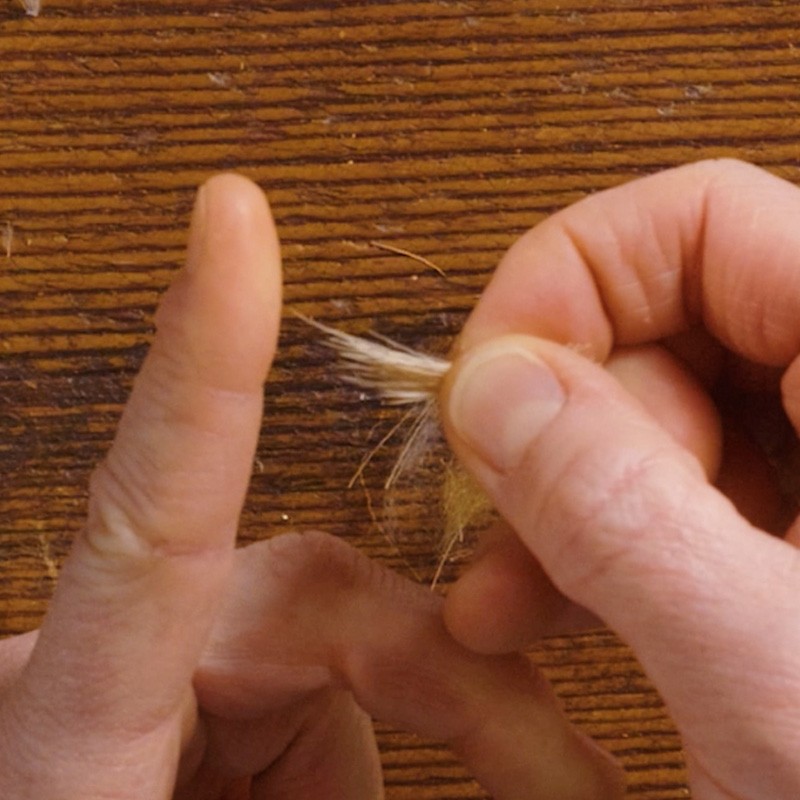
[00:09:39.92] And you'll see that there's a lot of these little fuzzies that guard hair underneath the under fur that I can just pull out with my fingertips.
[00:09:51.80] And then in order to align those tips, we're going to use a hair stacker. Put the clump of hair in tips first. Tips down.
(DESCRIPTION)
[00:10:03.31] She taps the stacker on the table.
(SPEECH)
[00:10:10.24] And then flip the hair stacker, pull off the top piece, and you're going to have perfectly aligned little tips. Get those fuzzies out. There we go.
(DESCRIPTION)
[00:10:22.51] Pulls hair out of the stacker.
(SPEECH)
[00:10:24.67] Now, I can measure the length of the wing by holding the wing in my right hand. I want those tips to extend just beyond the bend of the hook. Once I have that measurement, I'm going to come in with my left hand and pinch so I know I'm right at my tie-in point. And I'm trimming the butt ends here but I'm leaving them long and you'll see why here. But even them up anyway, it makes it easier to tie-in.
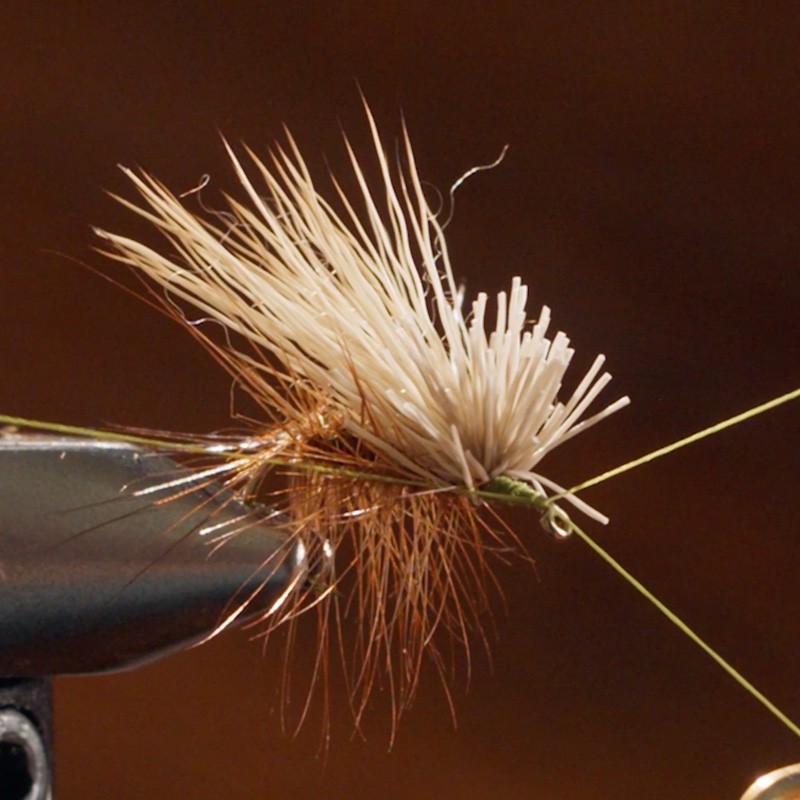
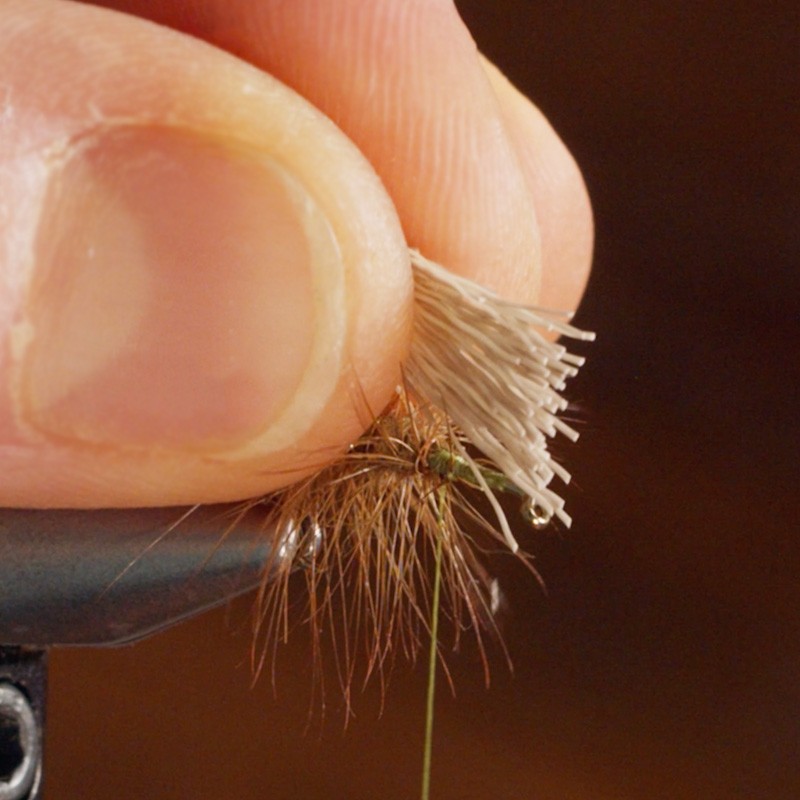
[00:10:51.16] And I'm holding the wing on top of the hook shank. Key here in preventing the elk hair from twisting around the hook, is to use a couple of loose collecting wraps first to keep all the hair together. And then as I come around that second time, I'm going to apply pressure as I pull upward. And that's going to pull the material straight down on the hook.
[00:11:20.07] Continuing with a few more wraps. Nice even pressure here to really seat that wing.
(DESCRIPTION)
[00:11:27.07] She continues wrapping the thread around the elk hair.
(SPEECH)
[00:11:31.62] And some extra fuzzies there. All right. Now, last step is pulling back those butt ends, like so, to expose the eye of the fly. And putting some nice purposeful thread wraps right in front of those butt ends is going to help them stand up a little bit and allow me to create a nice tapered head.
(DESCRIPTION)
[00:11:57.43] She wraps the thread around the hook.
(SPEECH)
[00:12:01.98] Good. Whip finish and then we'll trim this fly up and get it ready for the water.
(DESCRIPTION)
[00:12:09.46] Text: 4, Finish the Fly.
(SPEECH)
[00:12:13.01] Oops. Sure. Sometimes it's tricky not to capture some of those little bud ends, but we can clean that up at the end.
(DESCRIPTION)
[00:12:21.67] She uses a tool to create a knot on the hook.
[00:12:27.19] She cuts the thread.
(SPEECH)
[00:12:29.87] All right. Now, I'm going to give the fly a haircut. Just trim down the butt ends of the elk hair to form a nice, neat little head.
(DESCRIPTION)
[00:12:41.47] She uses a small pair of scissors to trim the strands of elk hair. She rotates the vise holding the hook and trims the hairs closest to the end of the hook.
(SPEECH)
[00:12:52.91] All right.
[00:12:58.57] Sometimes I'll get a set of tweezers in there too and pull out if there's any errant little guard hairs or pieces that went where I didn't want them to go. There we go. And then the final step would be the head cement. You want a high, penetrating, thin, clear head cement for this fly. And I like to put some cement right in front of the trimmed head and then a very small drop because I don't want it to penetrate that hair too much. But a small drop here behind the head and right in front of the wing.
(DESCRIPTION)
[00:13:36.26] Dabs on glue with pointed tool.
(SPEECH)
[00:13:39.50] I would fish this fly. You can dead drift it but caddis are active insects. So twitching it, give it a little action as it's coming through the water and the trout will slam it. Tell us where you'd like to fly fish in the comments below. Also, let us know what kind of videos you'd like to see more of. And don't forget to like and subscribe so you don't miss our next video. For more fishing tips and inspiration, visit Explore L.L.Bean at llbean.com/explore. See you next time.


